Tuesday 29 November 2016

Workwear Isn’t Just for Building Professionals

Whether you are a home improvement enthusiast or have a passion for DIY, it is essential to have access to good quality and durable workwear clothes. This will help to ensure that your own clothes are protected from substances such as paint, which can be notoriously difficult to remove, and will help to maintain health and safety when undertaking home improvement projects.

painter

Workwear Versatility

Workwear can be incredibly well-designed and comes in a range of different and versatile styles. The versatility of the items means they can fit in with any home improvement project you are working on; for example, if your project involves the use of many different tools and you are constantly going up and down ladders, you may want to consider clothes with handy pockets that can easily accommodate all the necessary extras whilst adding an element of safety.

Work pants are ideal because they usually have many different pockets and compartments, which are handy for all the extras you need quick and easy access to. They are perfect for projects around the home because they come in a range of different styles that have been cleverly designed to give you maximum comfort whilst you tackle various home improvements. Work pants are ergonomically designed to add a layer of protection, while extra stitching ensures that such clothes are less likely to tear.

Working Outdoors

Workwear clothes are also great for working outdoors, particularly in colder and wetter conditions, due to their water-resistant qualities. From well-designed long- and short-sleeved tops with extra pockets and stitching to warm rain-resistant layers that provide extra protection from the elements, this type of clothing is not just for professional builders!

Another excellent choice for workwear clothes around the home is overalls. If you are working with particularly messy materials, overalls offer a great all-round solution that ultimately provides extra protection for your clothes. Look out for overalls that are waterproof, particularly if you are working outdoors. If you are working with heating elements, a flame retardant overall may be the perfect option. If you find that you are constantly on your knees, knee pads can be useful for providing an extra layer of protection and comfort.

Workwear for Home Improvement

Home improvement projects can be fulfilling and satisfying. You can enhance your level of safety and comfort by choosing sensible work clothes that will provide protection and versatility, as they are designed to be comfortable, durable and safe!

If you would like to find out more on the various different types of workwear clothing that is available, please visit the Ballyclare website for more information.

The post Workwear Isn’t Just for Building Professionals appeared first on UK Home Improvement Blog.


from UK Home Improvement Blog http://www.ukhomeimprovement.co.uk/workwear-isnt-just-for-building-professionals/

Friday 25 November 2016

Projects that will Add Value to Your Home

We all want to add that extra bit of value to our homes, but doing so can often be a lot easier said than done. Throwing a load of cash at various renovation projects is all good and well, but if you’re not improving the right areas of your home, the return on investment may not be as much as you expect.

So what are the most valuable home improvements you can undertake in order to ensure the best return on investment? Well we’ve put together a list of the top 7 projects that we think will add the most value to your home – so pay attention homeowners!

house

7) Add lighting

By adding/letting in extra light into certain rooms, your home will feel more warm and welcoming. There’s nothing more depressing than a dark, dingy living space; and this is something that buyers will tend to pick up on when viewing your home. Both natural and electrical light can easily be enhanced to boost appeal of a room: Skylights and sun tubes are typically great additions to funnel in natural light, whereas increasing the wattage of your bulbs and adding a dimmer function will allow for brighter spaces that can be controlled to create mood.

6) Fix any structural defects

Repairing structural problems can be one of the most costly renovation projects, but if you want to add high value to your home, it’s absolutely crucial you action them. Sellers are often naïve to the importance of fixing the structural defects of a house and will tend to focus on decorating instead. Don’t make this mistake, and do the basics first. Ensure you check the functioning of your roofing and guttering, then assess your walls, ceilings, (are they cracked or damp?), floors, the plumbing, and anywhere you can think of that might need that extra bit of attention. It may be worth hiring the services of a builder or surveyor to get an experienced observation of the structural state of your property.

5) Replace the windows

Windows can make a big difference to the look of a house, especially in terms of first impressions before you actually enter the property. It’s important, therefore, that you ensure that what you install matches the style of your house, whether it be modern or traditional. Doing so will really improve the exterior aesthetics and consequently, add value.

4) Get a flooring makeover

You’ll be surprised at how much a new floor can enhance the overall look of a living space. Instead of sticking with your old, worn carpet, install something with a more modern feel. Modern laminate, solid wood, and engineered hardwood flooring are both great choices if you’re after a floor that holds value and looks fantastic at the same time. Quality hardwood flooring doesn’t have to break the bank, and if you shop around, you should be able to find yourself a bargain. Flooring Megastore are one of many flooring supplies that provide an excellent range of bespoke flooring at affordable prices.

3) Extend into the loft

Loft conversions are considered as one of the most valuable projects you can undertake; and with the vast amount of extra space it creates, it’s not hard to understand why. Extending into the loft is the easiest way to add an extra bathroom or bedroom to your home, which will definitely add a few £’s on to your home value. In 2014, Nationwide Building Society claimed that a loft conversion can, on average, increase the value of your property by up to 21% – so it may be costly, but it’s worth it. Alternatively, you could extend into your basement, or even do both!

2) Renovate your kitchen

Kitchens have become a real focal point of a house and now, more than ever, nice looking kitchen areas are seen as a huge selling point for buyers. If there’s one room you want to priories in terms of renovation, it should be the kitchen. New units, surfaces, appliances and general interior redecoration will go a long way in improving both the look of your kitchen and value of your home. A new kitchen project will typically add around 5% to property value, but watch how much you spend and make sure its relative to the overall value of your house.

1) Treat your garden like another room

A well-groomed garden often sits highly on the buyer’s preference list – no one wants to open their back doors to the Amazon rainforest. This is why it is important to landscape your outdoor space well; e.g. by planting, pruning, cutting back hedges, removing weeds, clearing debris and general clutter etc. Depending on the size of your garden, you could potentially install decking or a patio to really optimise your space and boost value. We also recommend that you ensure your garden is accessible and visible from the house – glass doors can be implemented to really open up your garden and create a portal from your own backdoor. Lighting, furniture etc. can also help bring your back yard to life.

So there you have it, a few DIY/renovation project recommendations for all you homeowners that wish to optimise your position on the property ladder and add
significant value to your homes. A final tip from us: renovate to achieve a standard of property that you would be more than happy to live in, and don’t go overboard.

For more information please visit OSC, a Kent based company who supply specialist DIY tools such as self-drilling screws and fasteners.

The post Projects that will Add Value to Your Home appeared first on UK Home Improvement Blog.


from UK Home Improvement Blog http://www.ukhomeimprovement.co.uk/projects-that-will-add-value-to-your-home/

Monday 21 November 2016

5 Beautiful DIY Decor Ideas to for Your Nursery

If you happen to have a bundle of joy on the way, then this is time for you to be crafty and creative. There ARE numerous projects you can do from cutting, sewing and pasting to create ceiling hung clouds or wall mounted canvases and a lot more. Below are five of some of the projects you can undertake for your baby.

Doodle Decorating
The most beautiful way to decorate your nursery is the first thing our list. It is by far the most personal and educative attempt to follow and something that no parent can overlook. It revolves around great means of expression such as drawing, coloring and doodling, activities that numerous studies have previously confirmed they have a huge impact on the child`s development. These endeavors greatly enhance the social, cognitive and physical development of the child, nourishing his creativity in the process thus making the decorating through doodles great seeds for the little one`s interest.
Frame your doodles while awaiting your child or simply wait him to get creative and frame his work, art ought to be present regardless and these simply activities should be encouraged as much as possible.

Nursery pom poms
Nowadays, tissue pom poms are a great addition to a nursery. The best thing about them is that you can purchase an assortment of different colors to make the nursery as colorful as you like. All you will need to use are the tissue papers, floral wire and fishing line. You can also easily create fabric pom poms if you would like to have a more lasting version.

Suspender curtains
Suspender curtains can be really cute in a nursery and the best part is that they are extremely easy to make. What you will need to make them is some fabric, fusible bonding web, scissors, iron, the overall buckles, hot glue gun, canvas strips, two buttons, curtain tension rod, needle and thread.

How to make

     You should begin with measuring the height and width of the window then add about 4” to the width and 6” to height on the fabric and cut.

     Fold the sides and button in one inch then use the fusible bonding web for hemming.

     You will make the curtain rod pocket if you fold the top down 5” then secure with a bonding web.

     Lay the curtain on a flat surface to be able to determine how high you will draw the shade. Place the buttons at the front with the straps behind the fabric then fold them over the front. Then cut the straps to suit the panel.

     After that, insert the straps into the overall buckle securing it with hot glue and repeat.

     Then sew the button in front of the curtain panel and sew the end of the strap directly behind it. Repeat.

DIY drawer pulls
You can purchase vintage yo-yo’s on sites like eBay and turn them into cute drawer pulls. To make the pulls, what you will need is the wooden yo-yos, drill, pliers, hanger bolts size depending on drawer panel thickness, nut:

How to make it

     Pre drill a hole just a little bit smaller than the hanger bolt into the back center of the yo-yo.

     Twist the hanger bolt in the hole using pliers.

     Insert the bolt into the hole in the drawer then fasten it with the nut tightly.

Paper dot mobile
This is also quite easy to make as you watch a movie on a lazy Sunday and what you will need are a small hole punch, 2” circle punch, nine pieces of 12”x12” card stock, 8mm jump rings, needle nose pliers, two embroidery hoops 8” and 6”, screw hook, fishing line.

     First, cut circles with the 2” punch

     Punch holes of 1/8” from top to bottom of the circles then string nine of the circles together using the jump rings. You should punch only one hole for the top and bottom circle.

     Hot glue the top circle of each strand to the embroidery hoops.

     Make nine more but use the 6” embroidery hoop.

     Glue the fishing line to three spots on each hoop then hang from hook.

What do you think about these simple yet great things? We would love to hear your opinion on the subject in the comment section below !


from Home My Heaven: UK Home Improvement Blog http://www.homemyheaven.co.uk/2016/11/5-beautiful-diy-decor-ideas-to-for-your.html

Friday 18 November 2016

How to Clean Double Glazed Windows

cleaning double glazing

Investing in double glazed windows is a worthwhile cost, providing increased thermal efficiency that will make significant savings on your heating bill in the long term. Maintaining your windows is essential to ensure they last for years, minimising the damage caused by wear and tear, weather effects, and other outside elements.

We’ve listed some of the top tips to keeping your double glazed windows clean for best results below.

You will need:

  • A soft cloth
  • Non-abrasive cleaner or warm soapy water
  • A cup of white vinegar to keep windows streak free

Cleaning your windows

Remove any large items of debris to avoid scratching the glass, then use your cloth soaked in the cleaner or water to wash the windows. Adding the cup of white vinegar will help avoid streaks forming as the windows dry, creating a sparkling finish.

It’s essential that you only use a soft cloth – an abrasive brush can scratch or damage the appearance of the glass. Some people also opt to use a vacuum cleaner with a brush attachment on their window frames, which is an effective method to clean up any dust and debris that may have gathered there.

Tougher stains

For tougher, more stubborn stains, a PVC solvent or uPVC cream can be an effective method to tackle these areas. Always make sure that the cleaners you are using are suitable for the windows to avoid damaging the seals and compromising your double glazing.

This article was written by Abbey Glass, a double glazing based in Sheffield. Abbey Glass can provide quality materials and a professional installation service scheduled to your convenience.

The post How to Clean Double Glazed Windows appeared first on UK Home Improvement Blog.


from UK Home Improvement Blog http://www.ukhomeimprovement.co.uk/how-to-clean-double-glazed-windows/

Why Coloured Radiators are Growing in Popularity

On our blog today, we’re here to give you a little bit of interior inspiration regarding coloured radiators.

Yes, we have many talents here and interior design with a good-eye is one of them! Prepare yourself for a discussion on colour, style and how your radiator can help transform a room.

We believe that radiators shouldn’t just be a metal thing that you hide behind a sofa.

When you look at our catalogue, you can see that our ranges of radiators are innovatively designed with style as well as efficiency. Due to the fact that every home has a different personality, we provide a wide spectrum of radiators that has the ability to suit your individual taste. The choice is endless!

A common question: How can I make my radiator something ‘that ties the room together’ rather than ‘that old metal thing on the wall’?

Try this – next time you’re looking to buy radiators, why not try something a bit more adventurous? Get rid of ol’ rusty in the corner and invest in a BRIGHT COLOURED RADIATOR to add a fresh change to your room.

Several of our radiators come in an interesting palette of colours – here are just a few options that you could choose from to help brighten the place up.

Bisque Blok Radiator

bisque blok coloured radiator

This aluminium radiator of Italian design is sure to add an interesting splash of colour to your living space. Simple and sophisticated, this unit comes in a vast range of colours to excite and inspire any home decorator.

As you can see in our catalogue, the selection of colours for this model is incredibly diverse, from subtle blues to bolshie reds and crisp greens. Just imagine a bright burst of yellow to greet guests in your living room, or perhaps a calming blue to help you wind down in your bedroom?

A stylish radiator for all looks and moods. Check it out!

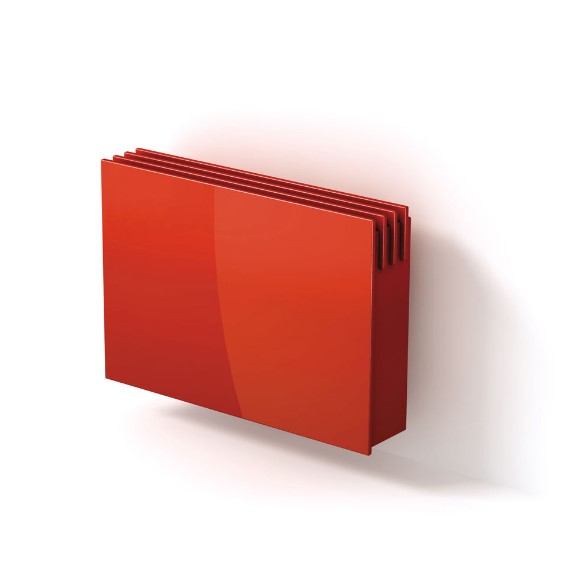
Aestus Koloris Single Glass Panel Wall Mounted

aestus koloris coloured radiator

This wall mounted radiator model has a gorgeous, sleek glass panel design in an assortment of vivid colours. From zesty Chili Red to Green Grass, add a bold POP to your home.

Not only are these heaters stylish and slick in aesthetic, but the glass front panel means that it has an incredibly high heat output.

Not JUST a pretty face!

Bisque Archibald Electric Towel Radiator

electric towel radiator

Nothing feels as good as getting out of the shower and wrapping yourself in a hot towel straight off the radiator…

The Bisque Archibald Electric Towel Radiator offers you a stylish way to keep your towels warm in your bathroom. Coming in a wide range of colours, this quirky clothes hanger design is a fun way to bring colour in your bathroom.

Aeon Abacus

aeon abacus

Now we’re talking! For people who want something fun and artistic in their homes. This stainless-steel abacus inspired radiator is a kaleidoscope of colour and would be a feature in any room, perfect for general fun lovers and children’s nurseries. Can you believe this is a radiator? Looks more like a work of art!

The coloured abacus globes also come in silver and gold designs if you are looking for a different effect.

Now that you’ve seen some of our coloured radiators, and the different incarnations they come in, it’s time to start exploring Designer Radiator Direct – this is only the tip of the ice berg , Their catalogue of radiators is filled with interesting, stylish units that could help transform your home. Happy exploring!

The post Why Coloured Radiators are Growing in Popularity appeared first on UK Home Improvement Blog.


from UK Home Improvement Blog http://www.ukhomeimprovement.co.uk/coloured-radiators-growing-in-popularity/

Tips and Ideas for Commercial Kitchen Design for Small Kitchens

Commercial kitchen design has a direct impact on the performance of a restaurant/café across a number of different measures, including efficiency, safety, and profitability. Good design will take account of many aspects of commerciality, from staff safety and ergonomics to food production and the efficiency of foodservices equipment.

By minimising the amount of movement around the kitchen, and the number of steps involved in the completion of a task, kitchens can increase both their productivity and safety. This is achieved by careful planning and consideration.

Three key factors determine good kitchen design:

  1. Budget
  2. Space requirements and capacity
  3. The choice of equipment

Today, we are going to look at the methods involved in designing a viable and profitable commercial kitchen.

commercial kitchen design

To Create a Viable Commercial Kitchen Design You Must Consider the Menu

The first step in the design process is to look at the type of food that you are going to create. Consider each dish from start to finish and document all of the various cooking methods, storage, and preparation requirements needed to make the dish.

You should map your entire menu in this way before deciding on the kitchen size, plan, or layout. If you are restricted to a specific space beforehand, and your menu is too complex, then you will need to drop some dishes off the menu in order to accommodate for this.

Make a List of All of the Catering Equipment Needed to Create the Menu

Once you have done this, you should have a comprehensive list of all of the equipment you will need to complete the kitchen. You can then set about working out how big each of these items needs to be in terms of capacity, and then set about finding these items from a kitchen equipment supplier. This will give you the dimensions of the various pieces of equipment, and this will in turn allow you to work out how big the kitchen will need to be (taking into account walkways).

Choose a Site for Your Kitchen

Now you know how much space you need, you can then set about choosing a site. This could be an existing kitchen, a kitchen that requires remodelling, or a kitchen that you construct from scratch.

Once you have chosen your site, contact your local HSE advisor to ensure that the space is viable for intended use. Otherwise, you might end up with an expensive project.

Take Note of the Precise Measurement of the Space

Next, you need to establish the precise measurements of the kitchen, taking into account the position of the windows and doorways, electrical sockets, piping and plumbing, and various drains (i.e. for washing machines, dishwashers, and sinks).

Ideally, you should use 3D modelling software to create a plan of the kitchen, with all of these existing fixtures and fittings in place. If you are having the kitchen designed professionally, then the designer will take care of this for you. If you do not have access to 3D software, then Architect paper is a sufficient, albeit time-consuming alternative.

Work Out How You Will Make Use of the Space

The first consideration should be flow and ergonomics. These refer to the way that people move around the kitchen and the safest manner of using the various features in the kitchen.

A commercial kitchen should function in such a way as to minimise the number of steps involved in creating the dishes, while at the same time maximising efficiency, safety, and productivity. There needs to be sufficient room for people to move around the kitchen safely, while ensuring minimum time wastage.

Contact a Relevant Architect and Building Inspector to Authorise and Implement Your Plans

The final step in the process is to ensure that your plans are workable and legal. To do this, you need to contact the Food Standards Agency for recommendations and advice. They will be able to direct you to the relevant people. It’s important that you have your plans assessed on a variety of conditions, including food, plumbing, electrical, and fire safety amongst other things.

We hope that you have found this article informative. Should you require further help and advice, please get in touch at garnersfse.co.uk

The post Tips and Ideas for Commercial Kitchen Design for Small Kitchens appeared first on UK Home Improvement Blog.


from UK Home Improvement Blog http://www.ukhomeimprovement.co.uk/commercial-kitchen-design-for-small-kitchens/

Wednesday 16 November 2016

A Mom's Review of Prolectrix Soup Maker


For a busy mom, you’ll need every bit of help you can get to make your tasks a lot easier. This is exactly where soup makers come into play. They are a great help in cutting down preparation and cooking time in case the family requests for a hearty soup for dinner.

Unfortunately, not all soup makers are created equal. While some of them can hasten cooking time, there are others that will just throw your money into waste.

Prolectrix Soup Maker is one of the best soup makers you can get your hands on. Here’s a list of pros and cons, based on firsthand experience, to tell you why.

Pros:

The soup maker is great for big families, like mine. It’s able to hold 1.3L t0 1.6L which can be enough to feed at least four grownups in a single meal. You can even have some leftover for tomorrow.

Prolectrix Soup Maker is also easy to clean. It’s made from stainless steel and comes with a specialized cleaning brush to make sure I’m able to remove all food debris from it. Since it’s made from steel, it’s quite sturdy and durable, too.

The heating element sits right under the stainless bucket. I find this design very convenient since it gives me enough space to clean the area as well.

Prolectrix Soup Maker doesn’t take a lot of space and effort to move around. It’s just around the size of a kettle and comes with the functions of both a blender and soup maker. It’s made of 1000w of power: 800w for heating and 200w for the blender.

The three buttons for its soup making functions is a plus factor for me, too. Having a kid around, I really enjoyed using its puree function for making delicious and healthy baby food. The chunky option, on the other hand, is handy whenever I need to whip something up for my growing kids. It’s a time-saver since you only need to toss chunks of vegetables in it.

The safety control feature of Prolectrix Soup Maker is something you won’t normally find in other similar products. It’s intelligent enough in that it doesn’t activate until you get its lid completely locked. It also has added features that help prevent your soup from dry burning or over-spilling.

Aside from soups, this soup maker also works well when it comes to creating dips and smoothies.

Cons:

Despite having the ability to crush chunky vegetables, you still need to make sure they’re at the right size. I had problems with this soup maker, particularly during the first few uses. Every time I need to  boil potatoes, they always got burnt at the bottom.

For optimum cooking and for you to avoid having charred vegetables, you need to cut them down into quarter inch pieces. It’s also recommended that you put in water before the ingredients to make sure you don’t burn them.

Conclusion

Prolectrix Soup Maker is a good choice for busy moms. It can cook soups in as fast as 30 minutes. It offers blending and heating power to ensure that your soup cooks well.

If you can get past the inconvenience of having to chop your vegetables to the recommended size, this is actually a great product to have in your kitchen. It’s small and sturdy. It can fit on your counter quite easily. Plus, you also get a recipe book when you go buy the product. You will no longer have to worry about how you’ll prepare your dinner since you’ll have a wide range of recipes to choose from.

Author’s Bio:
Freya is a mom to three kids. When not cleaning after her children’s mess, she’s spending her extra time writing and researching about products that can make motherhood a lot easier. Her latest work deals with soup maker reviews.


from Home My Heaven: UK Home Improvement Blog http://www.homemyheaven.co.uk/2016/11/a-moms-review-of-prolectrix-soup-maker.html

How to Choose the Right Size Skip for your DIY Project

For some home improvement projects, simply chucking your waste into the household bin isn’t the best solution. If you’re doing a big clear out, refurbishing a room, or undertaking an ambitious DIY project, hiring a skip for the day may be the ideal solution for quickly and cleanly clearing away your waste.

Benefits

You may be thinking that a skip is a costly investment for a simple domestic project, but that’s far from the truth!

Skip hire will actually reduce your waste disposal costs, providing a quick and easy solution to getting rid of your waste in one fell swoop. What’s more, a skip will ensure you comply with all waste disposal regulations when dealing with certain materials, providing a safer method of disposal and keeping your home and the surrounding area safe. Finally, skip hire allows you to lessen your environmental impact by selecting materials to be recycled instead of sent directly to landfill.Skip with rubbish pile beside it

Why would I need a skip?

Skips are suitable for a range of construction and domestic wastes, including general waste, building materials, soil and more. If you are handling potentially hazardous materials, you should discuss your needs with us first to ensure you are not putting unauthorised materials in your skip.

What can go in a skip?

Skips are suitable for a range of materials, although it is always best to check with your skip provider first:

  • General waste
  • Construction waste (e.g. concrete, aggregates)
  • Soil
  • Timber
  • Metals
  • Green waste
  • Dry recycling

Skip Sizes Explained

For home improvement projects, it’s unlikely you’ll need a commercial-sized skip. We stock smaller skip sizes ideal for home improvements and renovation projects that can be delivered and picked up at your convenience. Skip sizes ideal for home DIY projects include:

3yd Mini Skips

Measuring 5’ x 4’, mini skips are ideal for smaller amounts of household or garden waste, capable of holding up to 25-35 black bags of waste. These skips can be used for a huge range of projects, from simply throwing out unused items while redecorating, to completely rehauling the look of your garden.

4YD Midi Skip

Midi skips measure 6’ x 4’3, so are more suited for large household or garden construction improvements, such as demolishing an old shed, renovating a large room or several rooms in one go, or a total spring clean or your garage and attic.

8YD Builders’ Skips

At 12’ x 5’6, builders’ skips are a popular skip size, ideal for large domestic renovations such as complete refurbishments, or garden landscaping.


The post How to Choose the Right Size Skip for your DIY Project appeared first on UK Home Improvement Blog.


from UK Home Improvement Blog http://www.ukhomeimprovement.co.uk/how-to-choose-the-right-size-skip-for-your-diy-project/